For reference, I was attempting a general-purpose saddle.
The Tree
Glue spots aside, I had two other issues with the tree.

The first involves the arms at the front. In the KeriOkie pattern, the arms of her tree fit into slots in the upper flap piece. While this might be closer to true life, I think a few hobby tackmakers choose to forego the arms, and just glue the finished tree right on. Honestly, trying to get the arms to fit into the flap was just a pain in the butt, and more than once I had to hack them down to get them to fit into the rest of the saddle shape. This means there are bits of where the foam is visible (the blue spots here and there). Decision: the arms will be removed from the tree pattern.
Thought: I also wouldn't mind putting in a bit of a cut back as well. Right now it's pretty flat through the front.
(Edit: The more I look at the picture above, the more I wonder if it is just my blondeness not realising that there's a cut back already in there.... Gosh, I have my moments sometimes. Will have to experiment and see if I can work with it before I go and scrap this tree pattern.)
And I think the tree that made it into the saddle is bent in the wrong place too, maybe a touch too forward? It's not a soft curve either, but I think that may be more a result of assembly and me getting frustrated.
Next up is the cantle. For this saddle I chose not to use the blocking method to stretch the method, and I think this decision had a run-on effect in terms of the creases in the seat and the ugly finishing on the rear of the cantle. Decision: return to blocking out the seat skiver.
The Flaps

In the photos, it appears that the lower flaps are poking out from underneath. Though it's not really visible when the saddle is held in the hand, I think that my pattern failed to take into account things like the roundness of the horse's barrel, the assembly, thickness of the leather, etc. The lower flap is shorter than the upper, but I don't think by enough. Decision: make the upper flap longer/trim the lower flap shorter.
Flap shape: I showed Lisa a photo of the saddle on Sunday, and she suggested that the flaps were too round. I just cruised around online briefly now, and found a good photo of this Tekna saddle (no model number) on a horse:

It's a pretty good shape, so I think I will use that as the basis for the next pattern. (But really, I know next to nothing about flap shape. I just found this interesting blog by a saddle-fitter and in this post she talks about billet position and how it's not a one-size-fits-all scenario for horses. I'm planning to go back further through her archives and see what else I can find!)
In previous posts I talked about wanting to get rid of the 'junk' in the pommel area, where it's clearly visible how the pieces and layers intersect. I thought that if I made the channel between the panels underneath wider at the front end, I would be able to lift the very front of the lower flaps higher, and thus be able to over it with skiver and hide it away a little.
I kind of failed in this aspect; in assembly I forgot about my idea to try and hide that area away, so while there is more room there for a high wither, it still looks messy. For reference, here's a great picture of an English pommel.
Click for a bigger version.
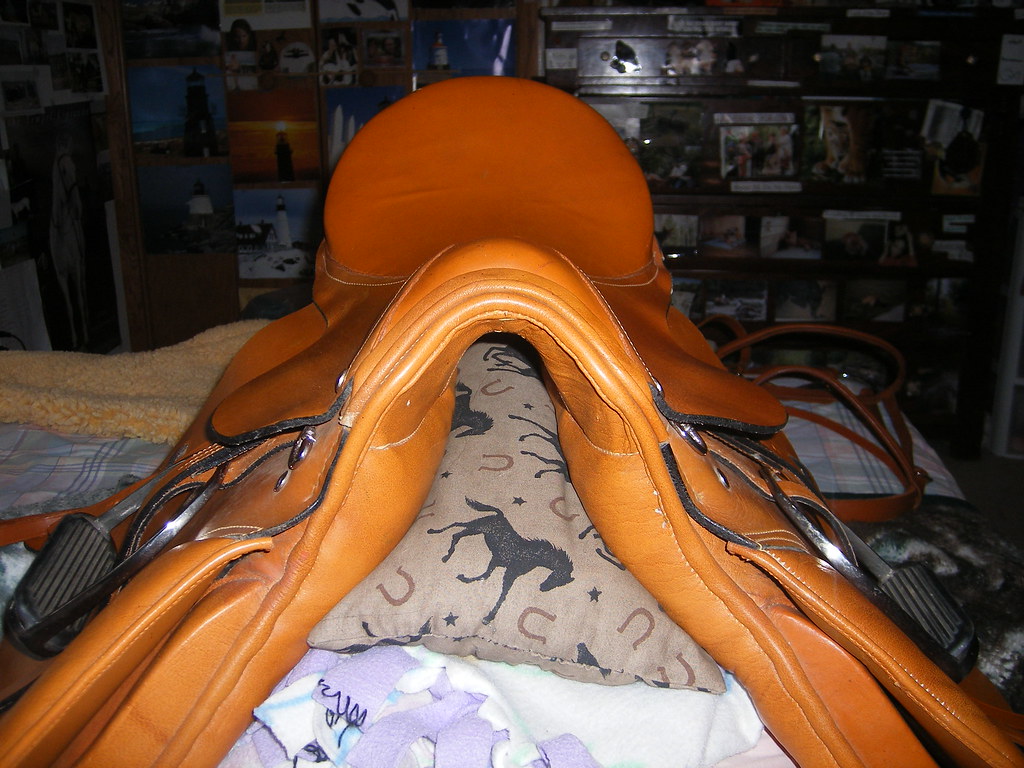
And here's my saddle, haha:

(Click to see it in all its messy glory.)
The real saddle is so smooth and big! I love that everything is drawn in and tidily hidden away. It all blends seamlessly together. I'm wondering if the key might be to eliminate the front bar on the lower flap - this part here:

That would eliminate the whole 'hiding it away' part of the process if there wasn't actually anything there to hide. And then one long piece of skiver could be used to create the roll of piping in the pommel, and then it would follow the length of the saddle underneath and be the piece that sits behind the panels, if that makes sense. (Edit: just learnt that this piece is called the sweat flap!)
The Skirt
The skirt shrunk somehow, so needs to be wider (pommel to cantle), but I think the height is pretty reasonable. I also screwed up several times putting the pins in, which left holes in the skirt. The pins are still wonky, so I definitely need to fix that for next time.
The Panels
One thing I didn't like about the panels on saddle #2 was how the panels showed the definition of the two levels of foam. I had a genius idea of flipping the panels over, so that the panels still have the depth afforded by the two pieces, but it's not visible. Success!

I did use the blocking method on the skiver used to cover the panels and underside of the lower flaps, but still have some ugly wrinkles. As much as I like the look of the blocking method, I might use a method I've seen other tackmakers use - wrapping the panels individually and then attaching them to the saddle. That way I might be able to get the bend in the foam and ensure the leather follows through as well.
I also just noticed that the panels are wonky - one is longer than the other. Le sigh.
Something went terribly wrong at some point. I mentioned this in an earlier post that the section of the lower flap that holds the back of the panels somehow ended up wider that the seat. At least now I've identified it, I think it will be an easy fix - just make the rounded ends of the panels smaller and not so wide - so it shouldn't occur on the next saddle. Hopefully.
Other Stuff
Just a couple of other little things. The D-rings should be back a little (when I make the skirt bigger next time, they should be hidden underneath), and I think the stirrup keeper needs to be down a little more as well.
Any other criticism I need to take into account before I tackle the new pattern?
And I promise the next post will have nothing to do with saddles!
No comments:
Post a Comment