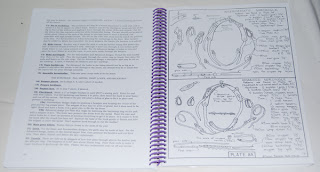
Early last week I received my Susana Bensema Young 'Guide to Making Model Horse Tack', and was promptly intimidated.
This thing is about an inch thick! That's a lot of reading to get through. I was awesome enough to get in on the 'purple binding' edition - purple is my favourite colour.
I had a quick flick through, and though there are some excellent sketches...
SBY's written style in the guide seems to be more conversational, rather than step-by-step. That's fine, it's something that works for a lot of people, but it's not one of my strong points. I think will need to make myself sit down when I have a bunch of time and go through all of it, and attack it with a highlighter. There's going to be a lot of information in there - I just need to find it!
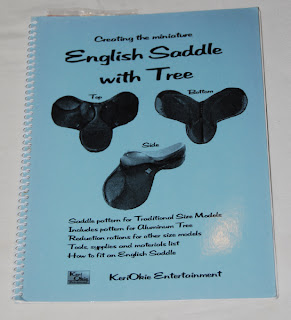
In the meantime, I turned to the other 'kit' I have here at the moment - my KeriOkie English Saddle guide.
Unlike the SBY book, the KeriOkie guide is very step-by-step, insofar as to provide pictures for every step. Excellent!
Read the rest after the jump. Very pic heavy!
I began the book at 10am Saturday, and after an hour or so of cutting out patterns and leather (and redoing some bits that I lost), I was about to get started!
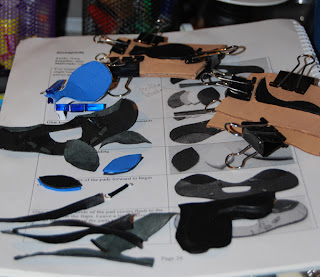
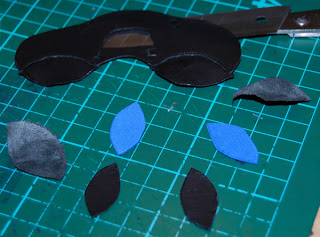
First came what the author calls the 'blocking' tools, which are used to shape the skiver prior to adding it to the rest of the saddle. I thought this was absolutely ingenious...
But it wasn't until I'd cut all the pieces up that I realised I'd some something terribly wrong.
There were a couple of pieces of the blocking tool that I couldn't work out why they existed. I already had copies of the panels and the seat - why did I need extras?
It wasn't until I read through the instructions again that I clicked.
The extras - where I'd taken the instruction 'cut out centre' the wrong way - were actually the middles of a frame to help force the skiver into shape. I didn't need the centres - it was the bit around it I needed. *lightbulb* Ohh!
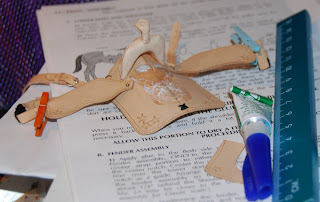
I repurposed an old make-up container to old water, so the skiver pieces could soak before I worked on each one, and used the blocking tool.
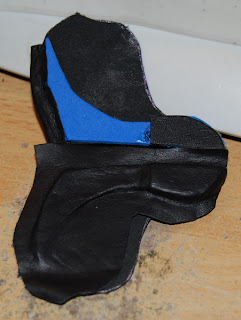
From there it was easy to form the skiver around the tool and encase it in the frame until it dried. As I don't have any actual skiver, I'm using my roo offcuts (the same leather my lace is made from) skived extra thin. I love that this leather is so versatile!
The book recommends gluing the paper patterns to the leather and cutting around them to ensure the sizes are correct.
My leather didn't want to play nice with the glue, of course, so I took the next step the book recommends, which is to trace the patterns, but when cutting them out, to cut inside the lines. Cue another lightbulb moment!
Using a tip from Jennifer Buxton's blog, I inserted wire into the piping that goes along the front of the saddle flap to help the saddle shape to the horse. I used 28-gauge wire, which now I've completed the saddle, is far too thin and did barely anything to help create shape. Next time I will use a craft wire I have here that I don't have an actual gauge number off, but may be in the region of 24 or 22 gauge.
I added stitchmarking to the 'tooling leather' pieces (unskived roo) with my Excel pounce wheel for a bit of extra flourish. :)
The tree is made from aluminium (from a soft drink (aka soda/pop/whatever else you Americans call it) can) and craft foam. This is also a really clever idea as cans are readily available and very cheap, but though it was good for the practise, I don't think it is really strong enough.I have some sheet metal here (which I bought after reading another of Jennifer's tips - this time on roller buckles) in 0.08" and 0.16" thickness (don't ask me what that is in milimetres) that might prove to be a bit stronger.
Here's what I finished Saturday night: the skiver panels shaped, the knee pads (squishy!) ready to be added to the upper flaps, and the tree about ready for assembly. There is the lower flap and other parts done that aren't in the picture.
Sunday morning saw the assembly of the tree - more squishiness with the craft foam, and the blocked skiver fitting so neatly over the foam!
I added the knee pads to the upper skirt.
From there it was a quick skip to the finish, despite having to reblock the skiver panel pieces as I hadn't put the block in the correct position, and they showed too much of the back of the lower flap.
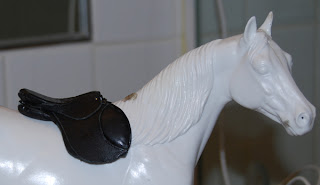
Finished!
There are a few boo-boos - a couple of glue spots, and areas where the tree or padding is visible, or pieces are a little wonky.
But overall I am pretty thrilled.
In these pictures the flaps are sticking out a little - you can see there needs to be thicker wire in the front piping.
Already I can see where the pattern needs improvement - the flaps need to be bigger, for instance. I think scanning the pattern in and adding to it that way, rather than trying to do it by hand (since doing things equally is not a strong point of mine!) will be the best way.
The next version I think will be classic, as the book provides reduction ratios for smaller scales. I can't wait to get started!
ETA:picture after a 24 hours of training with elastic bands:








No comments:
Post a Comment